new instructions to create the ISO file
download and install esxi-customizer
the problem with the latest release is version 5.5 left off the drivers – so the “vib” file can be downloaded here: net-tg3-3.124c.v50.1-1OEM.500.0.0.472560.x86_64
NOTE – i had to go in and select the connected NIC to get an ip number.
best approach for getting vmware working 2012-07-05 (2012-01-06)
1) download vmware-ESXi iso file “VMware vSphere Hypervisor 5.0.0 U1” (get license key too)
the file is called “VMware-VMvisor-Installer-5.0.0.update01-623860.x86_64.iso”
VMware-VMvisor-Installer-5.5.0.update02-2068190.x86_64 (2014-11-17)
0) NOTE to be sure you are formatted as fat/fat32, NOT NTFS ! 2014-11-17
1a) [OPTIONAL] use the HP tool to format the USB drive instructions here
2) boot from this ISO and install it – 2014-12-07 – not sure if isoTousb works on linux!
2a) consider using UNebootin and boot from usb-stick
2b) Rufus – MUCH BETTER option 2014-12-07

2b) reboot, F12, boot from HARD-DISK, and select thumb-drive
3) note that server username is “root” and there is no password, this can be set on the server by hitting f12 (or something like that)
4) install vmware client on another computer
5) download another OS ISO file (maybe a linux)
6) run the WINDOWS vmware-client-view (bottom option) and create a virtual machine
or https://my.vmware.com/group/vmware/evalcenter?p=vmware-vsphere5-ent
https://my.vmware.com/group/vmware/evalcenter?p=vmware-vsphere5-ent
the file is called “VMware-viclient-all-5.0.0-623373.exe”
VMware vSphere Client
2012-03-15 | 5.0.0U1 | 351 MB | Binary (.exe) (this was hard to find the second time
==================== added 2014-12-12 =========================
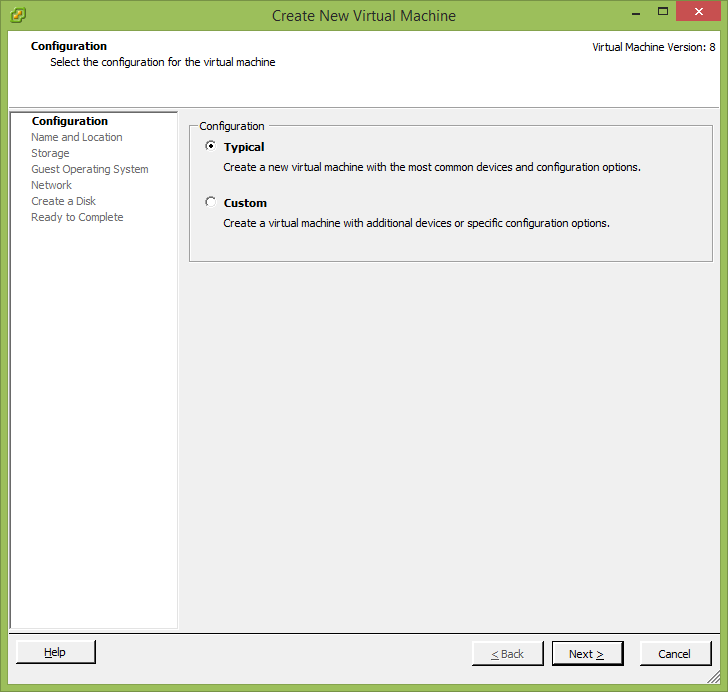
select New—>VirtualMachine:

Typical:
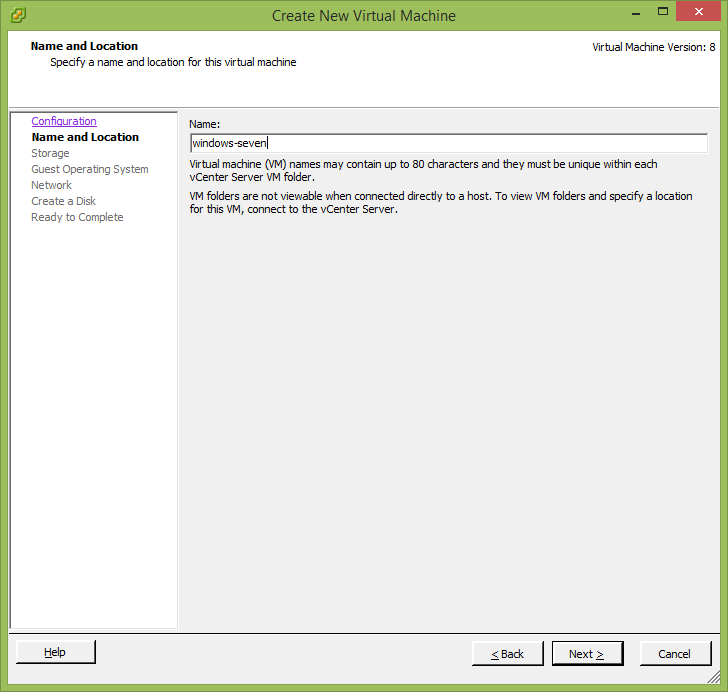
Name your new virtual machine:
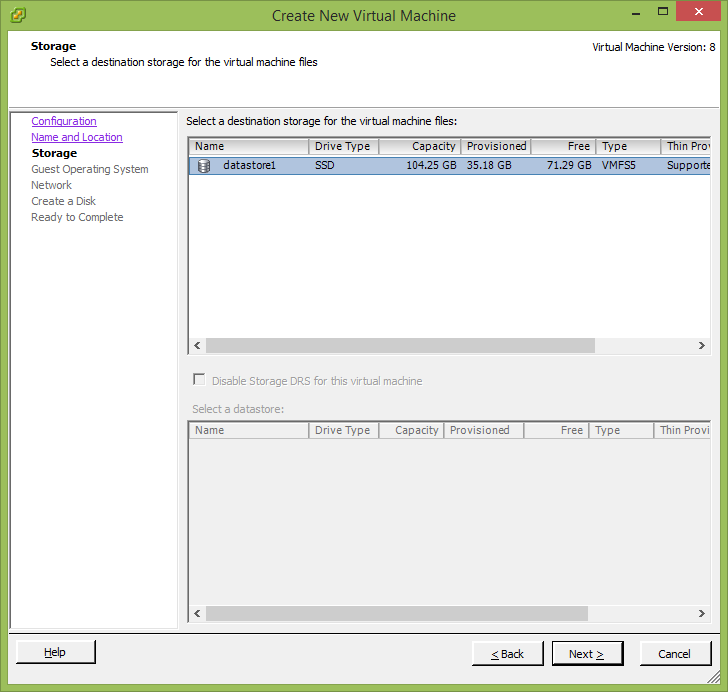
Next:
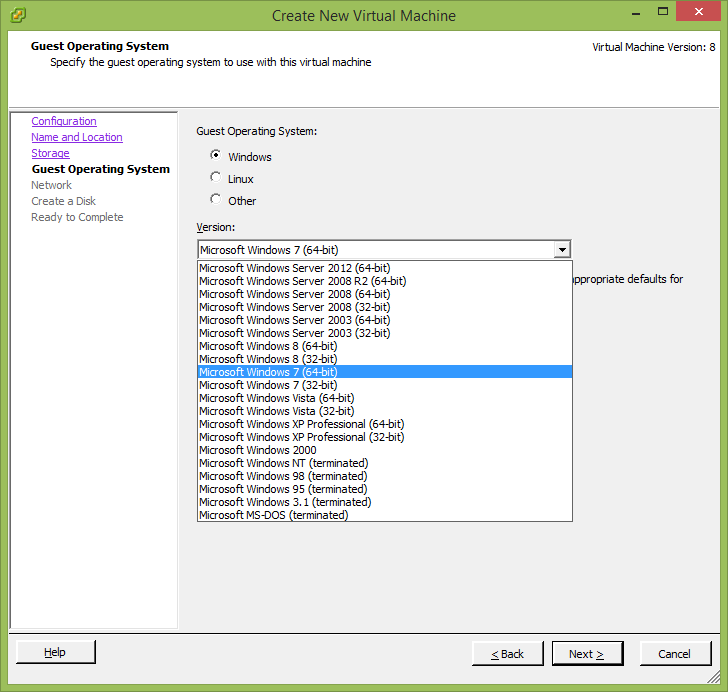
Select OS type and next:
Select network adapter (default) and Next:
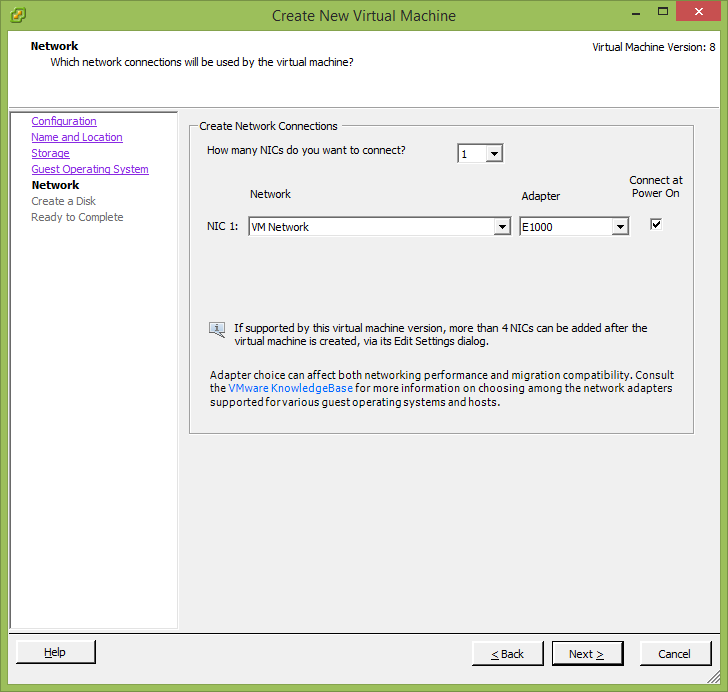
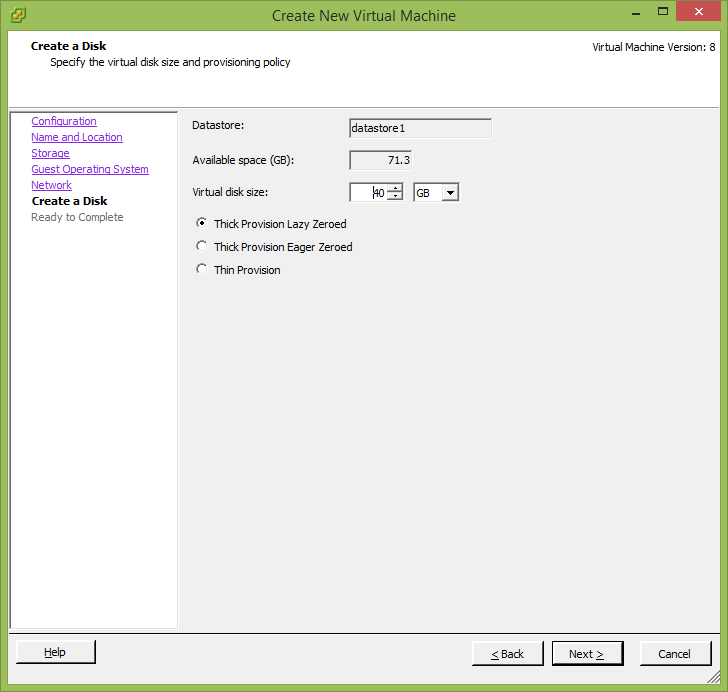
Set virtual disk size and Next:
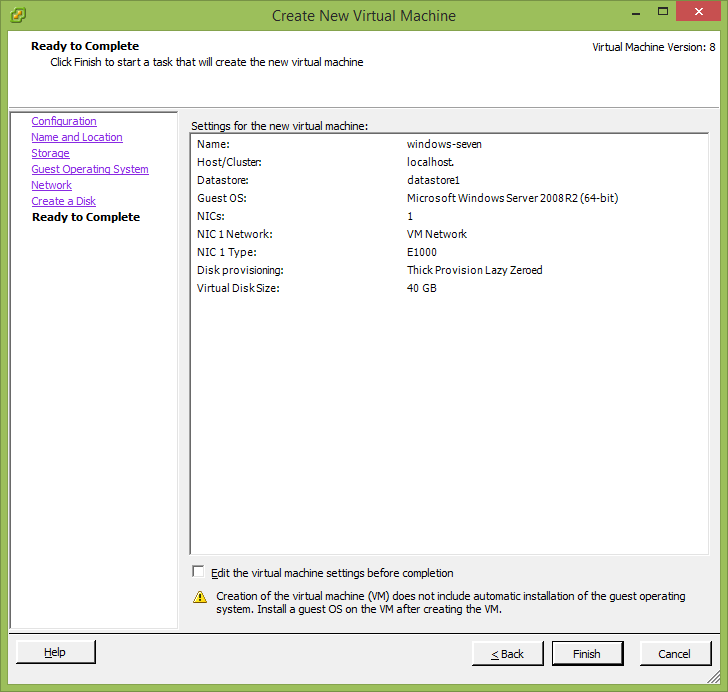
Ready to complete (optionally select “edit” and skip the next several steps):
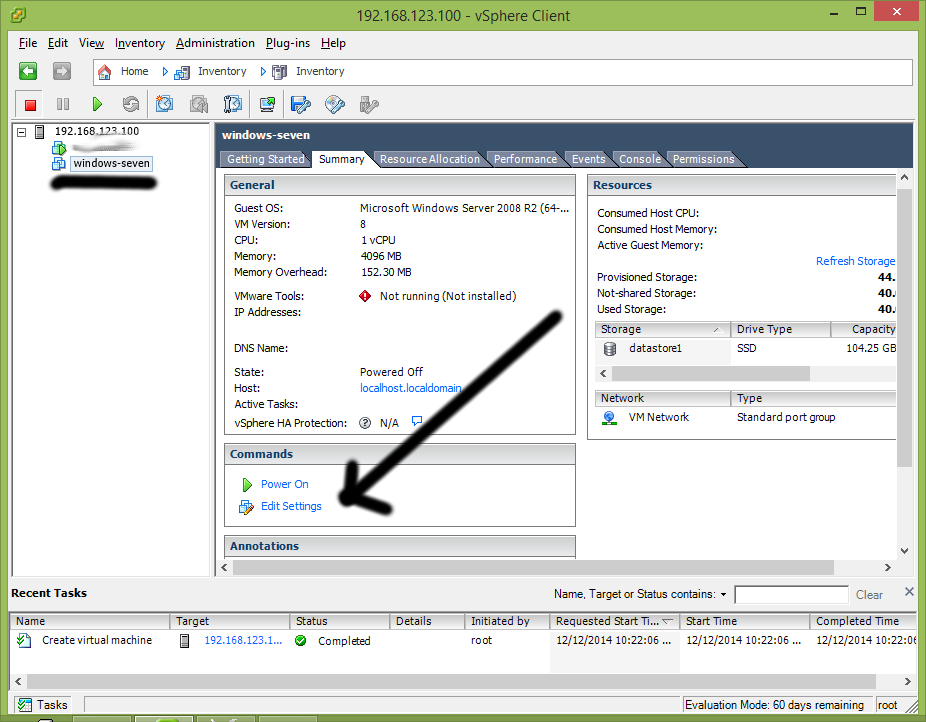
Click your new virtual machine, the Summary tab, and Edit Settings:
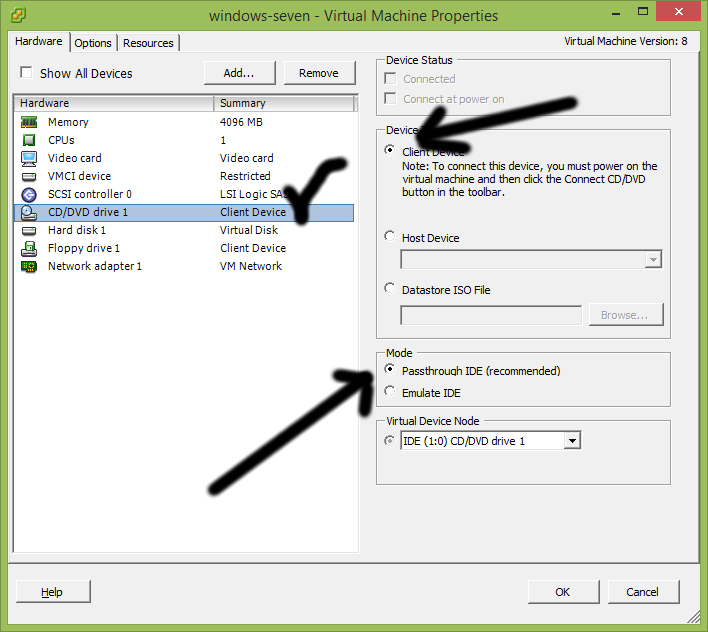
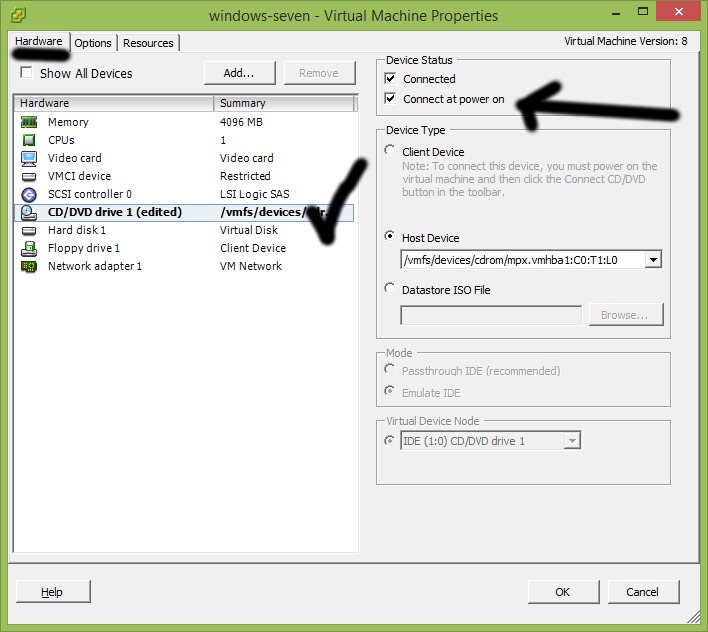
Under the hardware tab, click CD/DVD, Client Device, and Pass-through IDE (note this step might be skipped)
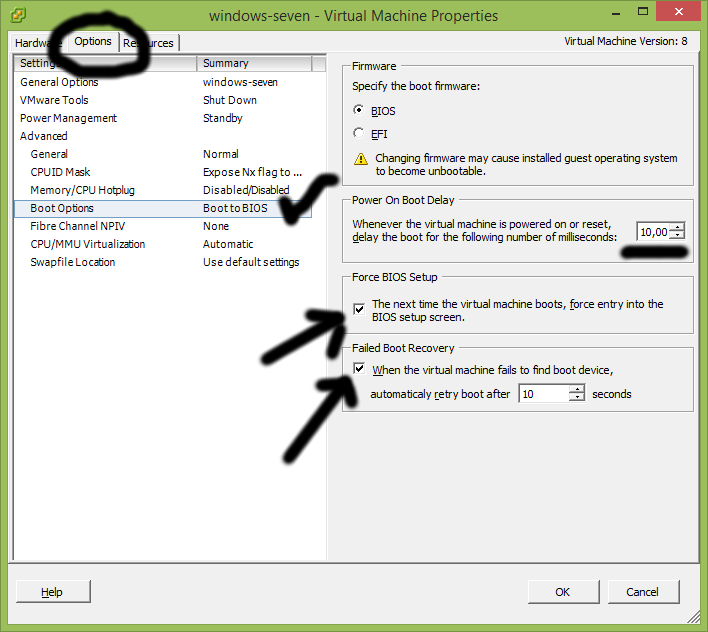
Options Tab, Boot Options, and check Force entry into BIOS, and optionally AutoReboot. the 10 second delay was from an earlier issue, not sure if this is necessary anymore.
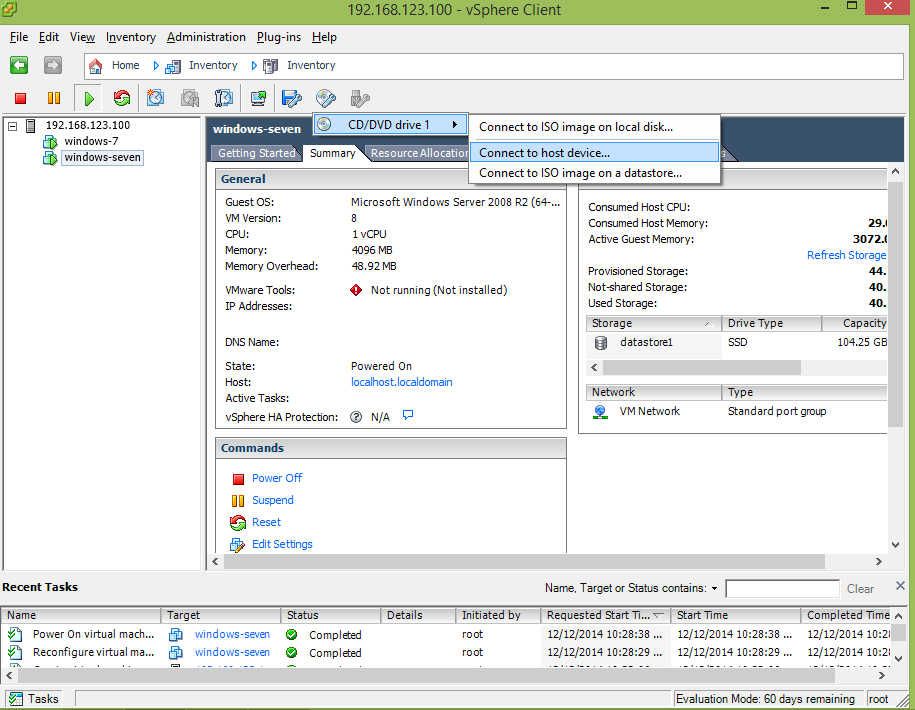
START THE NEW MACHINE! while starting, click the little CD icon (second from right), CD/DVD-drive-1, and “Connect to host device…”
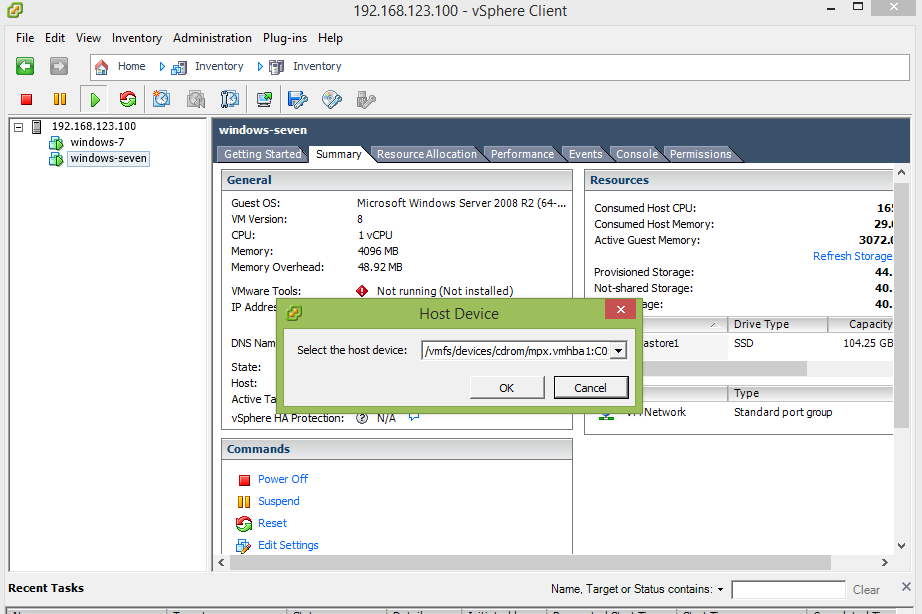
Select Host device (note that C0:T0:L0 is the upper drive, while T1:C0 is the lower drive)
Go back into Edit, Hardware(default), CD/DVD and check “Connect at power on” (this step is critical!)
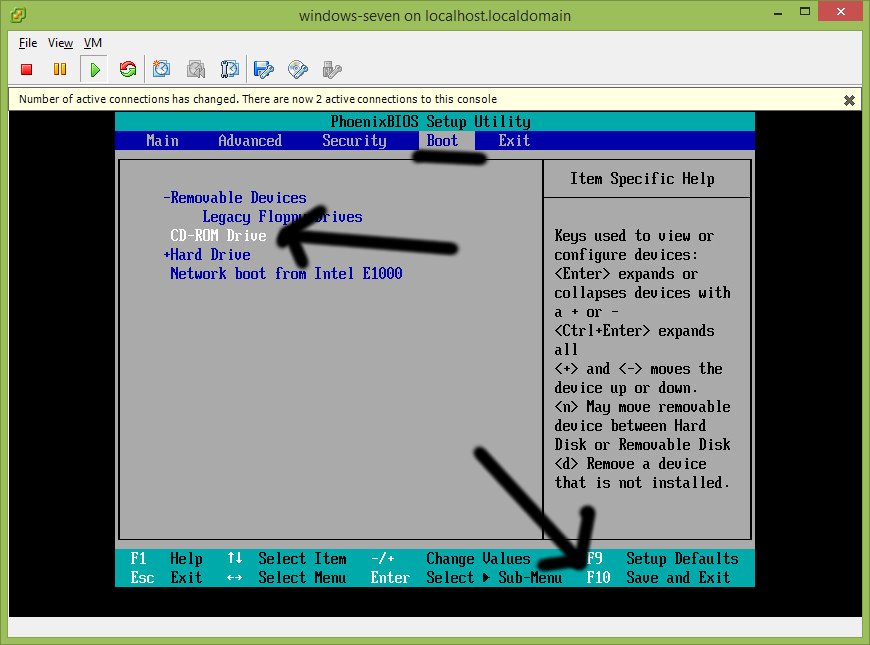
When machine starts up, it will go into BIOS. click the “Console tab, arrow over to “Boot”, and put “CD-ROM Drive” on the top via “+” key. F10 to save and exit. Ctrl-Alt to get out of this window.
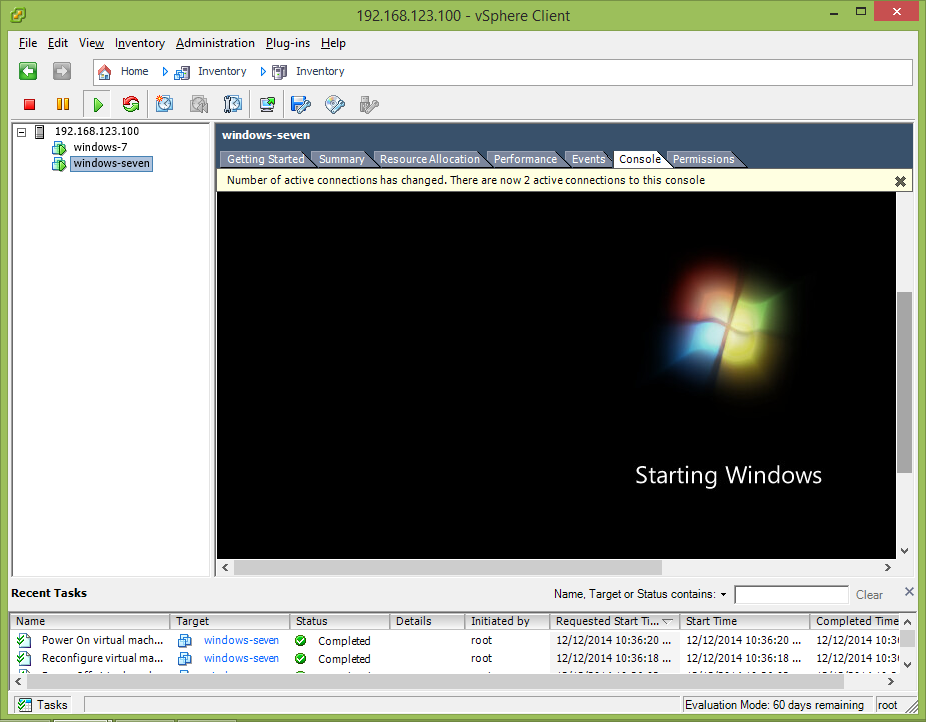
Success!
=====================end of new 2014-12-12 =================
6) set the vmware-client to have a 10 second pause when booting – there is a NECESSARY step when booting (i forget what it is)
7) when vmware-virtual-machine is starting, assign the CD-ROM device to the OS-ISO file
=================================
note that there are a LOT of options to mounting an ISO file. it can be mounted locally or on the host.
=================================
to mount an extra disk:

==================================
license key 5H62J-420D0-18748-03086-3WF6N
Go to the Configuration tab in the VI Client and click on Licensed Features under the Software section. Then click Edit and you should be able to enter the serial number.

======================================
mount another disk
==============================
OBSOLETE – VMWARE IS NOW ITS OWN OS – no need to install on stop of any existing os.
NOTE – i was unsuccessful at getting vmware to install on centOS:
rpm —import /etc/pki/rpm-gpg/RPM-GPG-KEY*
yum update;
yum install libXtst-devel libXrender-devel kernel-devel ;
yum install gcc gcc-c++ kernel-devel ;
yum install fetchmail wget bzip2 unzip zip nmap openssl lynx fileutils ncftp gcc gcc-c++ ;
<<
yum update; ## again
ln -s /usr/src/kernels/2.6.32-220.23.1.el6.x86_64 /usr/src/linux ;
./vmware-install.pl
ports ================= 2012-07-07
i was able to get vmware working remotely by setting each of the following portForwarding
to 192.168.0.1 => 192.168.123.150 in the DSL-modem (each port below in both tcp&udp)
http://kb.vmware.com/selfservice/microsites/search.do?cmd=displayKC&externalId=1005189
Note: Log in to your firewall and configure it to allow traffic using these ports.
These ports are mandatory:
22 – SSH
53 – DNS
80 – HTTP
902 – vCenter Server / VMware Infrastructure Client – UDP for ESX Heartbeat
903 – Remote Console
443 – Web Access
27000, 27010 – License Server
These ports are optional:
123 – NTP
161, 162 – SNMP
88 – Kerberos
464 – Active Directory
3260 – Software iSCSI
= old article =======
UPDATE – virtualbox.org may be much better….. (2011-10-15)
NOTE – ZONEALARM MAY HAVE TO BE SHUT DOWN OR ADJUSTED….
0) vmware requires a username/password on the ‘puter for the login-desktop where vmware is being installed – so your desktop user will require a password
1) get key from vmware: A800R-P8M0L-1AL33-48PUW
2) download and install vmware server
3) click the new vmware server icon – copy-paste the URL into FF and run with the IE-tab
4) create a new “virtual machine” – the defaults seem to work fine, except for:
- name the new VM meaningfully
- select OS type
- maybe change ‘network adapter properties from ‘Bridged’ to ‘NAT’
- you may need to mount an image ISO file
5) one final hoop is installing the “console” on IE – (damn IE)
6) zonealarm has to be turned off when starting a VM. there is probably a workaround for this.
2011-05-12 – another option to creating a virtual machine is to just download a VMDK file instead of an ISO. the VMDK file is a pre-built virtual machine ready to go.